New (Recommended): Web Control Center
Want browser control for Wi-Fi, modes, weather, lighting, images, and faces?
Follow the WebUI Firmware Upgrade Guide →
Before starting:
Thanks for choosing the IPS clock from Atomic Voyage.
To avoid issues (such as a black screen), only use firmware and tools from our official resources. If your clock was purchased from an unauthorized source, please contact us first before updating.
Firmware note (Gen2):
As of April 2024, all IPS clocks currently sold are Gen2. The latest factory firmware is Ver3.10.
If your clock is running Ver2.10, please update to Ver3.10 before continuing.
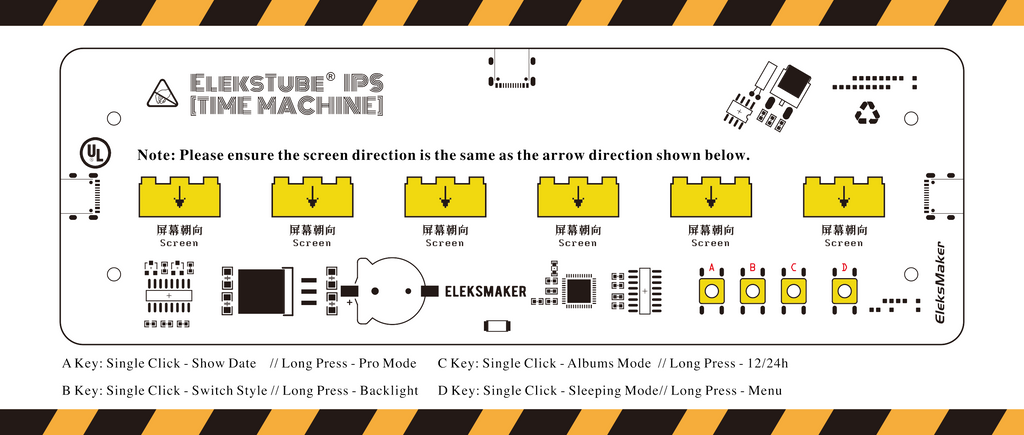
A few things to check - before starting:
-
Install the screen onto the base correctly — the front of the screen should face the buttons.
-
When installing the screen, avoid pressing the FPC cable on the back of the display.
Step 1 — Download the Windows PC Client
Download the PC Client here: Download the PC client for IPS Clock
Mac note: The PC Client is currently Windows-only.
If you want browser control on Mac, we recommend the Web Control Center firmware (see the link at the top).
Why use the PC Client?
You can still do basic settings from the clock’s onboard menu, but the PC Client is mainly for:
-
Uploading custom images (album / digits)
-
Setting up Wi-Fi and time sync
Step 2 — Connect the clock and launch the client

-
Connect the clock to your computer using the included USB data cable.
-
Open the PC Client.
-
When the driver and connection are correct, the status indicator (bottom-left) will turn green.
If the status indicator does not turn green, please check:
-
Use the included USB cable and plug into a native USB-A port on your computer
-
Reinstall the CH340 driver, then reopen the client and reconnect the clock
-
If the client won’t launch properly, move the program folder to the system root (for example: C:\) and try again
Step 3 — Set Wi-Fi, time sync, and timezone

Enter your Wi-Fi name (SSID) and password, then select the correct timezone. Click Save to apply.
Notes
-
Only 2.4GHz Wi-Fi is supported
-
Public Wi-Fi or networks requiring a browser login page are not supported
-
For daylight saving time (DST), adjust using the timezone option (automatic DST may arrive in a future firmware update)
Step 4 — Check device status (Device INFO)

Open Device INFO in the client to confirm:
- Firmware version
- Wi-Fi connection status
If the fields are blank, the clock may not be connected or configured correctly.
Step 5 — Upload custom images (Album / Digits)


Custom images support two modes:
-
Album Mode: upload up to 6 photos (slideshow)
-
Clock Mode (Digits): upload 10 images for numbers 0–9
Tip: Prepare your images first to make uploading faster.
Step 6 — Choose built-in dial styles
The clock includes 30+ built-in dial styles.
You can select up to 4 dial sets at the same time.
Using the clock menu (no computer / no Wi-Fi)


You can access basic settings directly from the clock:
-
Long-press the rightmost button to enter the menu
-
Change built-in clock face styles
-
Toggle 24/12 hour display
-
Set timezone
-
Toggle RGB backlight
NTP time sync requires Wi-Fi to be configured first (via the PC Client).
Need help?
This guide covers the factory firmware Ver3.10 setup.
If you run into any issues, contact us anytime — we’ll help you get it running.
Downloads
Share:
EleksTube IPS Gen2&Pro/PR1/PR2 Firmware Release Notes [Ver 3.10]
How to Easily Set Up and Use Your Atomic Voyage WFD II